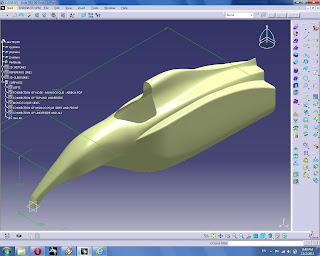
Time to create the surface that is the top of the monocoque sides and then fillet it. This should be a piece of cake compared to creating the curvature continious surfaces in the last post.
Hide the front part with the nose and monocoque, reveal the sweep used for an earlier split.
Split the sweep using the top half
The split the sweep with the bottom half
Join all and unhide the front 3d curve of the top guide. We'll use this to tweak the fillets to get nice smooth lines.

Create a new geometric set for FILLETS and underneath that CUTTING SURFACE. Create a sweep 1mm from the end of our surfaces. We're just going to barely cut off the front of this so that the fillets don't end on a tangent surface
Split the surfaces using the sweep. Now put points on the first corner we're going to fillet evenly spaced, 75mm apart.
Create a variable radius fillet with linear variation. Add all the points earlier created. Adjust the radius of the fillets so that is makes a nice smooth transition from front to back.
Bottom of the fillet should be a smooth profile as below
Load up the next corner with points, this time 50 mm apart
Create another variable radius fillet
Take care to smoothly widen the fillet as it moves to the back
Beautiful, and according to my reference photos, accurate
Time to connect the front and back. Create a new geometric set. Hide the surface we just created with fillets, and reveal the surface we started with before filleting.
Use the cutting surface we created under FILLETS to shave off 1mm of this.
I've changed the color to red, so the slice is more visible.
Create a couple of points on the edges of this slice and connect them with a line.
Split the slice with the line, keep the bottom part. Use the same technique as above to cut the top part. Now we've got this slot cut out
Fill this, using surrounding surfaces as supports
Great, now the underside.
Hide all, unhide the UNDERSIDE LOFT.
Create a new geometric set, disassemble
Ditch the surfaces on the y=negative side
Delete the surfaces in front of x=-1725 and anything above the shown 3d guide. We're left with one surface.
Split this surface with one of the sweeps at x=-1725
Unhide all our hard worked surfaces
Disassemble them
That's alot of surfaces. Delete the ones on y=-
Symmetry
Join all and enjoy for a moment, because that was a lot of work


No comments:
Post a Comment