What springs where on a Lola T-93/30? Many of my reference pics are black and white. The color ones indicate either black springs or Hyperco blue springs. Which means either they used hyperco springs, or they used springs painted black. Or color coded and in the factory they just grabbed whatever springs from a F3000 car that were laying around. Or they used different springs every race. Who knows?
A few F1 springs suppliers
Eibach
Hyperco
H&R
Southern Springs & Pressings Limited
Coil Springs (1989) LTD
I imagine that Lola probably sourced springs from the UK, so a member of this organization very well might have supplied some sort of custom springs
The UK Spring Manufacterer's Association
All that means that I have no idea what springs were on the car.
From my research it seems that 2 1/4 inch springs seem popular for coil over shock motorsports applications, so that will be my starting point.
So what should the spring seat look like? Well it would have to accomodate a 2 1/4 inch (57.15mm) ID spring. Let's say it's a Hyperco. Their technical information on page 9 of a .pdf from their website seems to suggest that 1/2 inch wire diameter might be common. So let's design the upper spring seat at first with the assumption that a .5" wire diameter 2.25" ID spring would sit in it.

Wow. Seems a bit big.
What if it were a 2 inch id spring?

Looks better.
I think I'm going to have to design a rough draft spring to get a better visual on this.
Ok, make a 2" 50.8mm circle

Put a point on it

Make a line from the point in the generative point design workbench

Make a sweep

Put a infinite line through the origin.

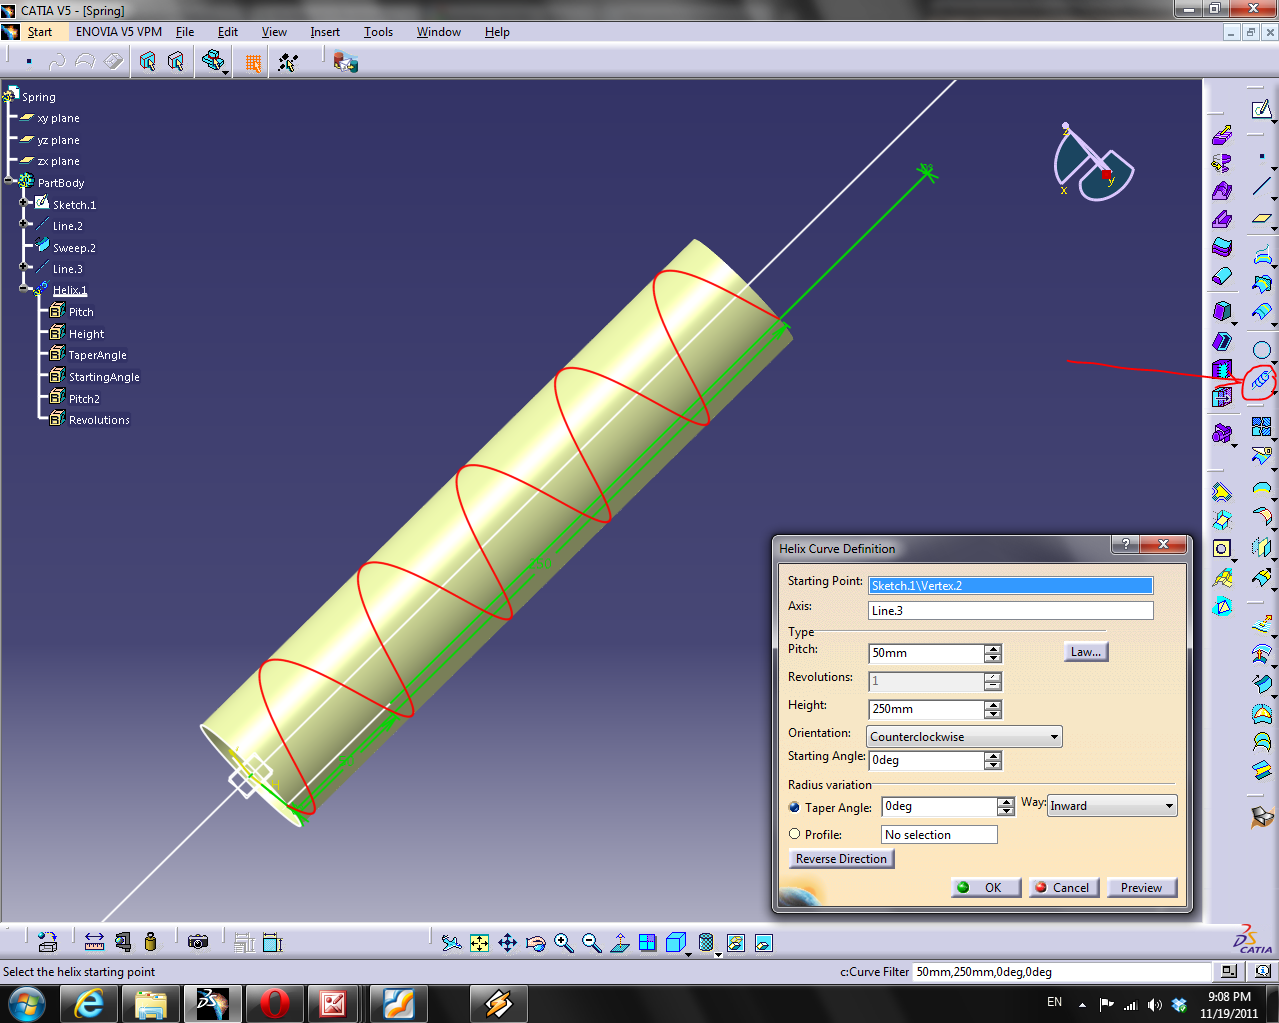
Make a helix
Make a 1/2" (12.7mm) circle 1" (25.4mm) from the centerline, so that the circle intersects the point we earlier created
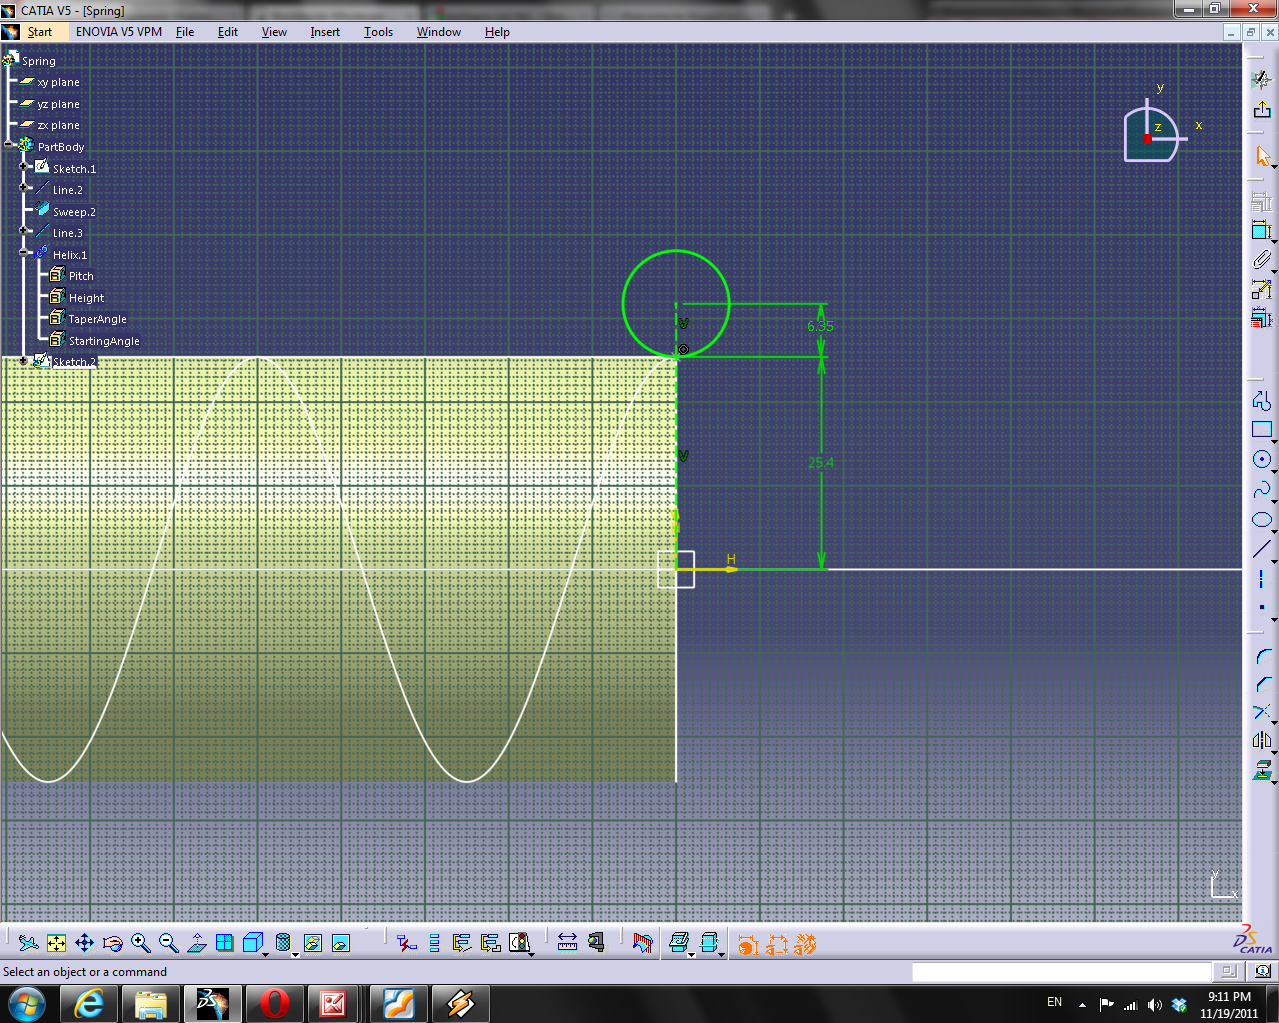
Sweep the circle with the helix as a guide curve and the cylider as the surface

Fill the ends

In the part design workbench, close solid, hide all the rest

Let's make it dark blue like a Hyperco spring

Add into the assembly

Wow, that is way too long! Reduce the height of the helix

Ok, that's a bit better

I think the pitch of the spring needs to be tighter

Interesting, but now I see it's too long again, my reference pic shows 4 coils

Ok, but now my piston rod is ridiculously long, so I'll shorten that up.
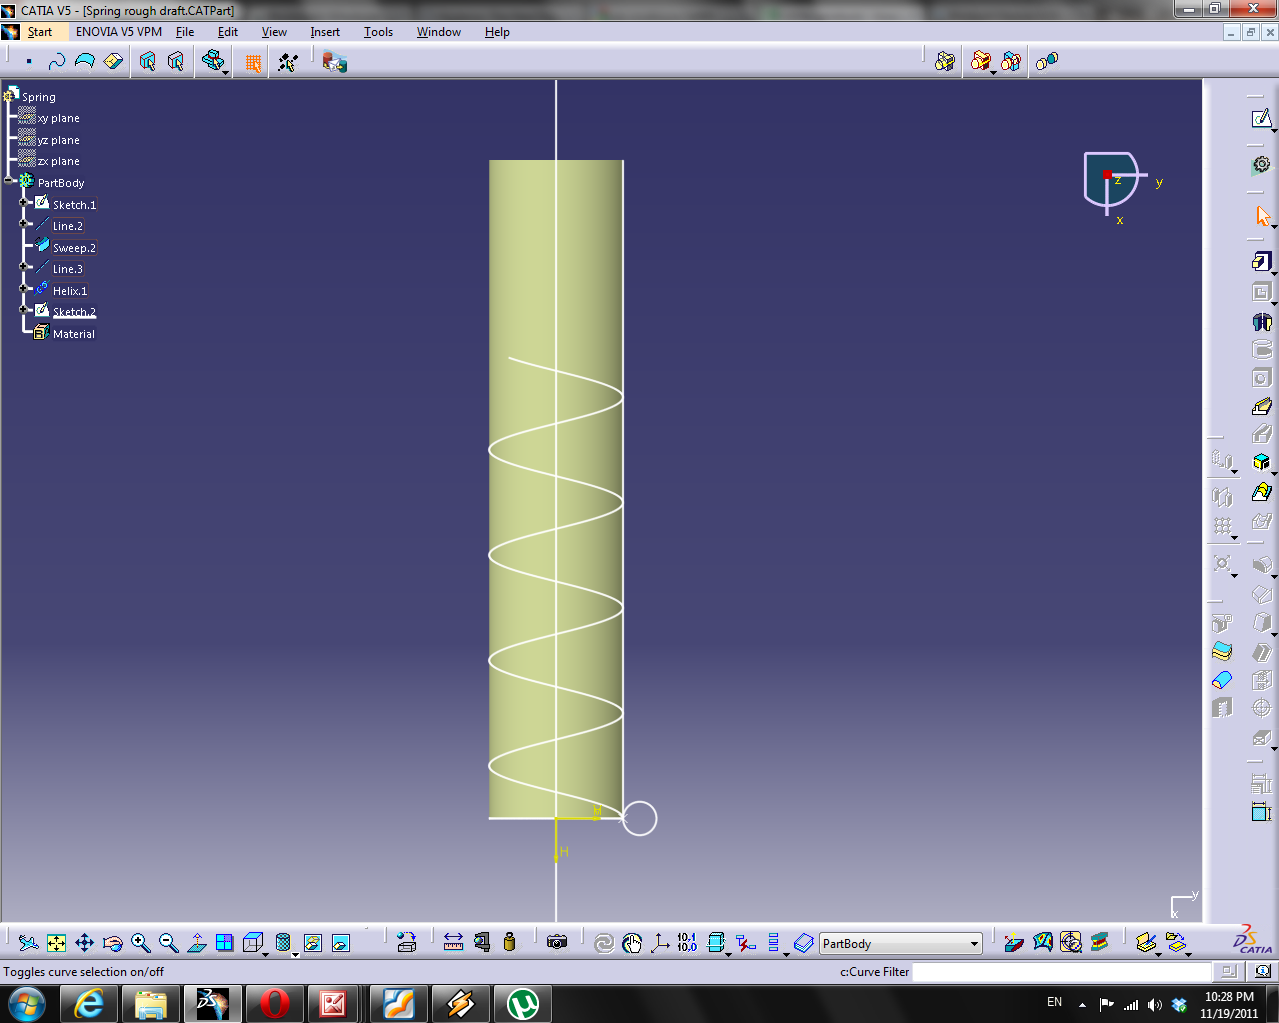
That looks alright, I think

Ok, let's taper the ends. Thanks to this for the inspiration
Lets head back to our original spring model. Get rid of all the solid stuff
Say that the helix has a height of 180mm, and has 4.5 coils. That means the pitch is 180/4.5=40mm.
So let's just make a line from the origin, with a length of (helix height - helix pitch)

And another line perpendicular with the length of the radius of our cylinder. That will make an intersection point with the helix.

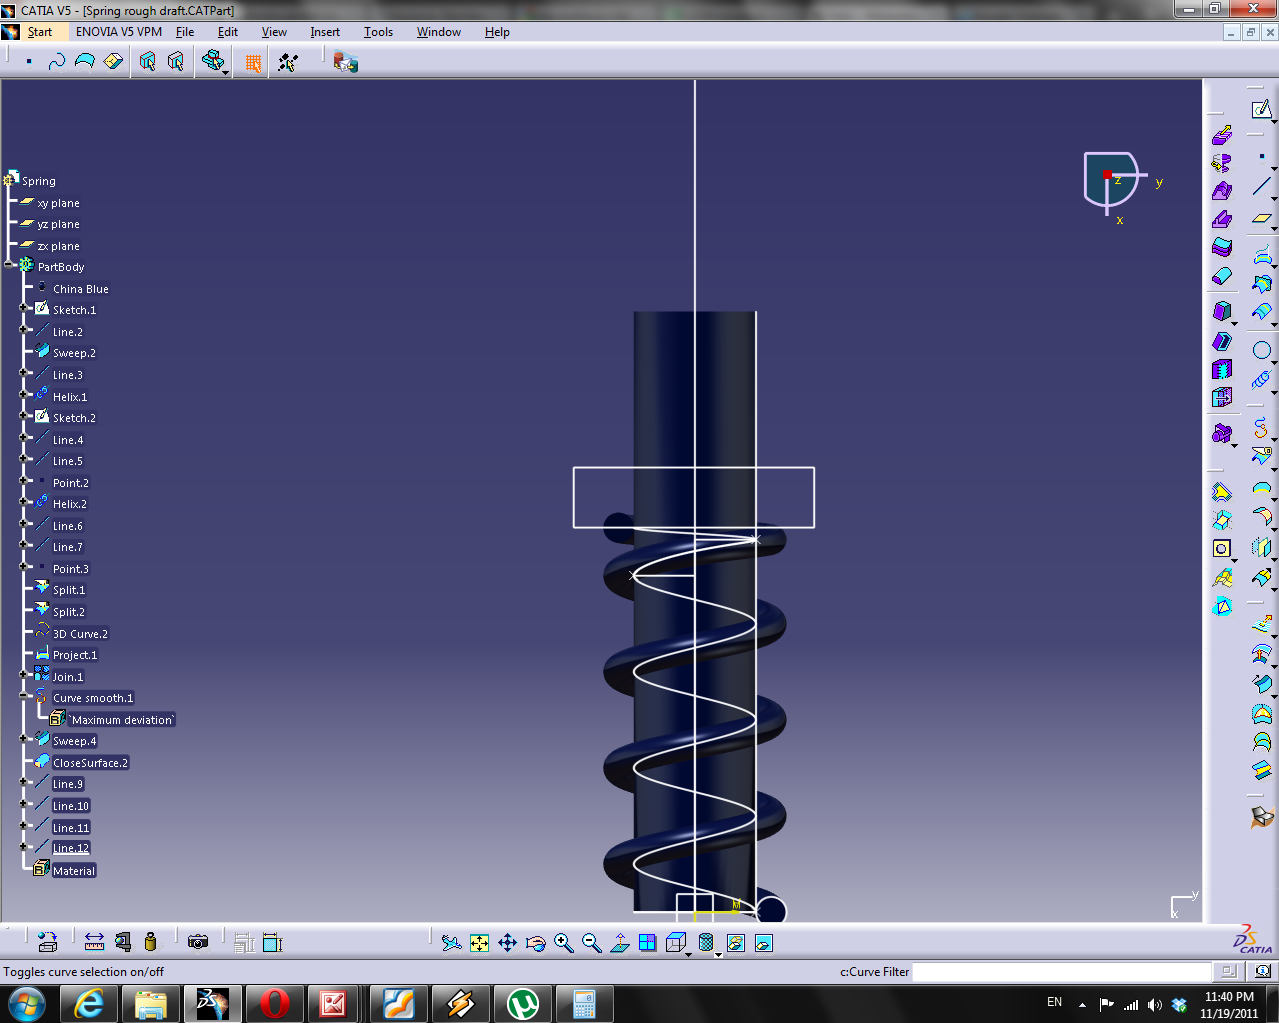
Put a point here. Create a new helix from this point using the same axis. The pitch is going to be 1/4th the original pitch, and helix height 1/2 the original

More lines. Next line is original pitch/8*3. Then another radius of the cylinder, and point

Split the...the..the...what is the plural of helix? Split the helices by the points.

Change to the Freestyle workbench. Create a freestyle curve imposing tangency and curvature continuity. Note it's not completely on the cylinder.

So project it on to the cylinder.

Join and smooth the two splits and our projected curve

Sweep again.

Close surfaces, hide all the stuff and apply material.

Put a line through the point at the top of the helix.

Make a happy box, join the lines that make the box
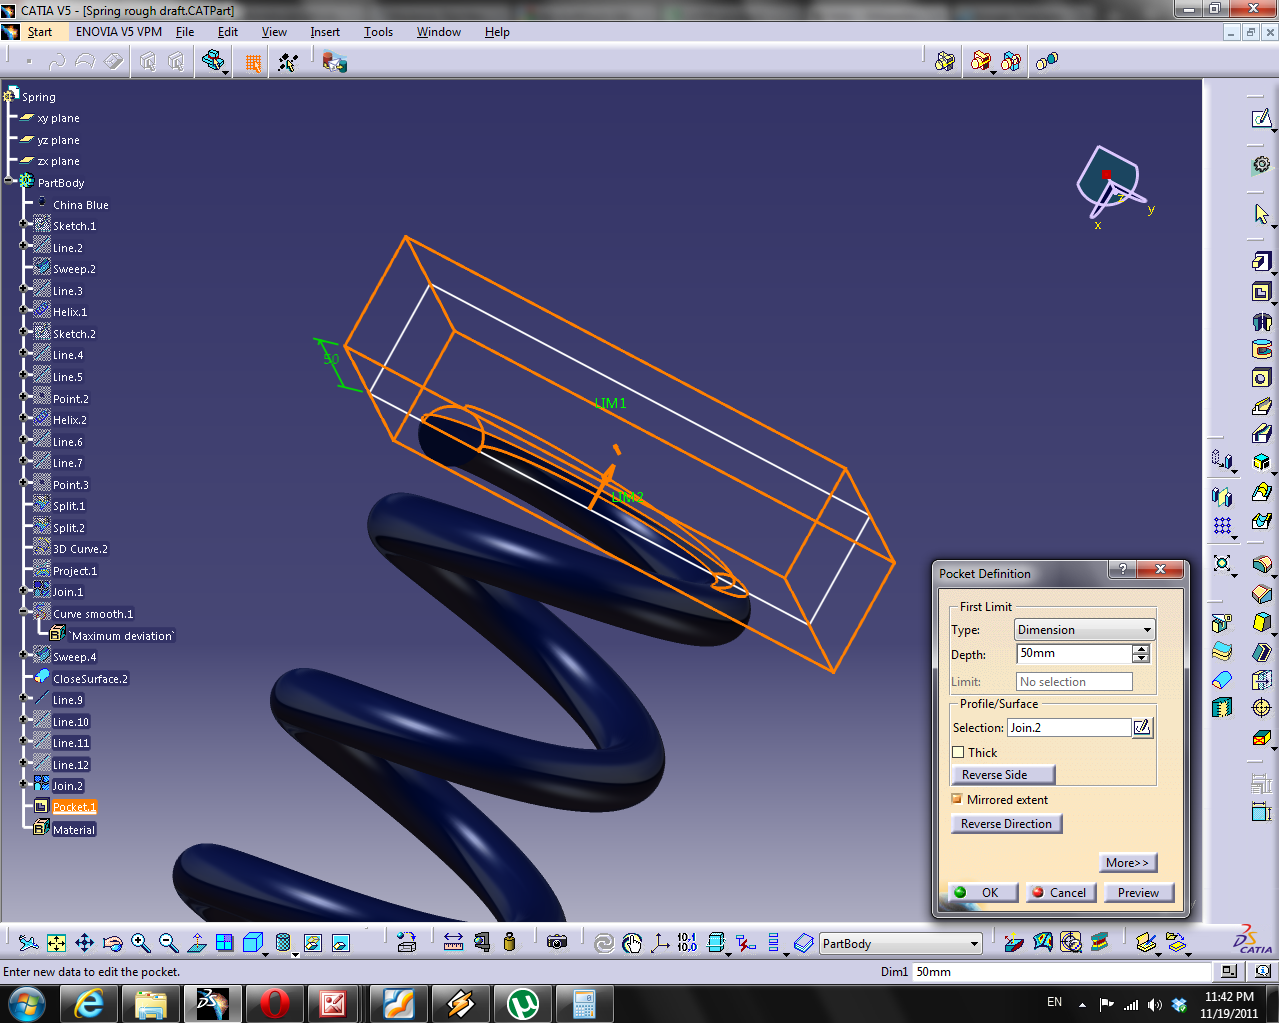
That worked out pretty well

Little bit lower though

Now we're talking. I think that's it for tonight
No comments:
Post a Comment